Timber floor staining is a fantastic way to elevate the natural beauty of wood, adding a touch of elegance and charm to any interior. Whether you have newly installed timber floors or want to revitalize existing ones, staining is a perfect choice. In this comprehensive guide, we will explore everything you need to know about timber floor staining, from understanding the process to choosing the right stain, and finally, maintaining the timeless appeal of your stained timber floors.
Understanding Timber Floor Staining
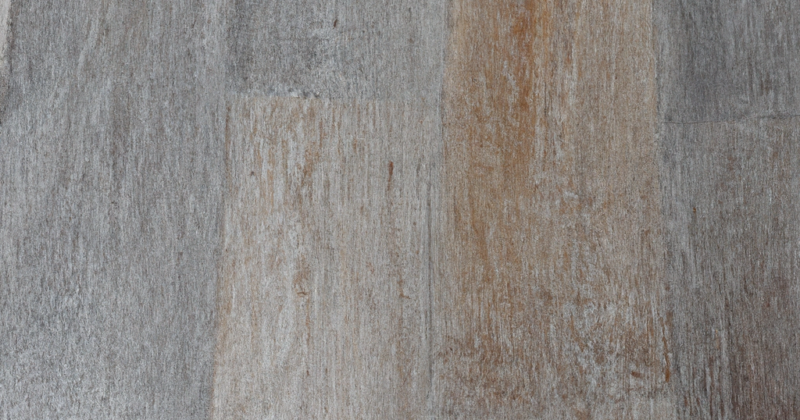
What is Timber Floor Staining?
Timber floor staining involves applying pigmented liquids to wood surfaces to alter their color and enhance their appearance. Unlike painting, which hides the wood’s natural grain, staining accentuates the unique patterns and textures of timber, giving it a warm and inviting feel.
Different Types of Timber Suitable for Staining
While almost any type of timber can be stained, certain woods respond better to staining than others. Hardwoods like oak, maple, and walnut are excellent choices, as their dense grain allows them to absorb and hold the stain beautifully. Softwoods like pine and fir can also be stained but may require additional preparation to achieve an even finish.
Explaining the Staining Process
The staining process involves several essential steps, starting with surface preparation. Before applying the stain, it’s crucial to ensure the wood is smooth and free from dirt or existing finishes. Once prepared, the stain is carefully applied, either by brushing, wiping, or spraying, depending on the desired effect.
Choosing the Right Stain
Importance of Selecting the Right Stain Choosing the right stain is vital to achieve the desired look for your timber floors. The right color can complement your interior decor, highlight specific features of the wood, and create the ambiance you desire.
Factors to Consider When Choosing a Stain Several factors should influence your stain selection, such as the wood’s natural color, the lighting in your space, and the overall style you want to achieve. Dark stains can add drama and sophistication, while lighter stains create an airy and modern feel.
Popular Stain Colors and Their Effects on Timber Explore popular stain colors like ebony, chestnut, and mahogany, and understand how each shade interacts with different types of wood. Dark stains can add richness and depth, while lighter stains allow the wood’s natural beauty to shine through.
Preparing the Timber for Staining
Necessary Preparation Steps Before Staining Before diving into the staining process, it’s essential to prepare the timber surface properly. Sanding the wood removes imperfections and creates a smooth canvas for the stain to adhere to. Additionally, cleaning the wood ensures there is no dust or debris that could affect the final finish.
Sanding and Cleaning the Timber Surface Choose the appropriate grit sandpaper and sand the timber in the direction of the grain to avoid scratches. After sanding, thoroughly clean the surface with a damp cloth to remove any lingering dust.
Addressing Existing Finishes and Coatings If your timber floors have previous finishes or coatings, it’s essential to remove them before staining. Use appropriate stripping products or sanding techniques to ensure the stain can penetrate the wood effectively.
Applying the Stain
Step-by-Step Guide on Applying the Stain To achieve a flawless finish, follow this step-by-step guide for applying the stain:
- Prepare the Stain: Stir the stain thoroughly to ensure an even distribution of pigments.
- Test on a Sample: Before applying the stain to the entire floor, test it on a small, inconspicuous area to ensure you like the color.
- Apply the Stain: Using a brush, wipe, or spray, apply the stain in the direction of the wood grain, making sure to coat the surface evenly.
- Wipe Off Excess Stain: After applying the stain, wait for a few minutes to allow it to penetrate the wood. Then, use a clean cloth to wipe off any excess stain.
- Achieve the Desired Depth: If you want a darker color, apply additional coats of stain, allowing each coat to dry before applying the next.
Different Application Methods The choice of application method can impact the final appearance of the stained timber floors. Brushing provides a traditional look, while wiping creates a smoother finish. Spraying, on the other hand, is ideal for achieving a more even and consistent color.
Tips for Achieving an Even and Smooth Finish
- Work in small sections to ensure the stain doesn’t dry before wiping off excess.
- Use long and steady brush strokes or wipes to prevent lap marks.
- Avoid over-saturating the wood with stain, as it can lead to blotching and uneven coloration.
Dealing with Challenges
Common Challenges During Timber Floor Staining Staining timber floors may come with a few challenges, such as uneven color distribution, blotching, and difficulty achieving the desired shade.
Solutions for Issues like Blotching, Uneven Color, etc. To overcome these challenges, consider the following solutions:
- Pre-condition the Wood: Applying a wood conditioner before staining can help prevent blotching by promoting even stain absorption.
- Layer the Stain: Applying multiple thin coats of stain can help achieve a more even and uniform color.
- Sand Between Coats: Lightly sanding between coats can help create a smoother finish and eliminate any raised wood grain.
Finishing the Stained Timber
Importance of Applying a Protective Finish After staining the timber floors, applying a protective finish is crucial to preserve the color and protect the wood from wear and tear.
Different Types of Finishes (Varnish, Oil, Polyurethane) Various types of finishes are available, each offering unique advantages:
- Varnish: Provides a glossy and durable finish, suitable for high-traffic areas.
- Oil: Offers a natural and low-sheen look, ideal for accentuating the wood’s texture.
- Polyurethane: Provides a tough and water-resistant finish, perfect for kitchens and bathrooms.
How to Apply the Protective Finish Correctly Follow these steps for a successful application of the protective finish:
- Prepare the Surface: Ensure the stained wood is clean and free from any dust or debris.
- Choose the Appropriate Finish: Select a finish based on your preferences and the level of protection required.
- Apply Thin Coats: Apply the finish in thin coats, allowing each coat to dry before applying the next.
- Sand Between Coats: Lightly sand the surface between coats to achieve a smooth finish.
Maintenance and Care
Tips for Maintaining Stained Timber Floors To keep your stained timber floors looking beautiful for years to come, follow these maintenance tips:
- Regular Cleaning: Sweep or vacuum the floors regularly to remove dirt and debris that can cause scratches.
- Avoid Harsh Chemicals: Use mild, wood-friendly cleaning products to avoid damaging the stain or finish.
- Protect from Furniture: Place felt pads or coasters under furniture legs to prevent scratches and dents.
- Address Spills Promptly: Wipe up spills immediately to prevent stains and water damage.
Cleaning Procedures and Products to Avoid To maintain the integrity of the stained timber, avoid the following cleaning methods and products:
- Abrasive Cleaners: These can scratch and dull the stained surface.
- Excessive Water: Prolonged exposure to water can lead to warping and damage to the wood.
- Vinegar and Ammonia: These acidic substances can strip away the protective finish.
Periodic Refinishing and Touch-Ups Over time, the protective finish on stained timber floors may wear off. Periodically refinish the floors to maintain their beauty and durability. In case of minor scratches or faded spots, touch up the stain and finish to restore the floors’ original allure.
Staining for Different Timber Types
Best Practices for Staining Hardwood Floors Hardwood floors have a dense and tight grain structure, making them ideal for staining. Follow these best practices when staining hardwood floors:
- Sanding: Hardwood floors require thorough sanding to achieve an even and consistent stain absorption.
- Choose the Right Stain: Experiment with different stain colors to find the one that complements the wood’s natural hue.
- Top-Coat with Care: Apply the protective finish with attention to detail, ensuring a smooth and uniform surface.
Staining Softwood Floors and Their Considerations Softwood floors are more porous and prone to blotching. When staining softwood floors, consider the following:
- Pre-conditioning: Use a wood conditioner before staining to prevent blotching.
- Test on a Sample: Test the stain on a small area to observe how the softwood reacts to the color.
Staining Techniques and Effects
Creative Staining Techniques Explore creative staining techniques to add character to your timber floors:
- Layering: Apply different stains in layers to achieve a multi-dimensional and unique look.
- Distressing: Create a rustic appearance by intentionally distressing the stained wood with various tools.
Achieving Specific Effects (Aged, Vintage, Modern) Stains can be used to achieve specific effects on timber floors:
- Aged Look: Use darker stains and distressing techniques to create an antique and time-worn appearance.
- Vintage Style: Opt for warm and earthy tones to evoke a nostalgic and vintage ambiance.
- Modern Vibes: Choose lighter and minimalist stains for a contemporary and chic feel.
Staining Patterns and Designs
Creating Patterns and Designs with Stains Stains offer the flexibility to create stunning patterns and designs on timber floors:
- Herringbone Pattern: Arrange the timber boards in a herringbone pattern and use contrasting stains for a classic look.
- Geometric Designs: Experiment with geometric shapes and patterns using different stain colors.
- Borders and Inlays: Add elegance with stained borders or inlays around the edges of the room.
Popular Stain Patterns and Their Applications Explore popular stain patterns and how they can enhance the aesthetics of your timber floors:
- Two-Tone Stain: Using two different stain colors on alternating boards can add visual interest and depth.
- Gradient Stain: Gradually transitioning from a darker stain to a lighter shade creates a stunning gradient effect.
Timber Floor Staining DIY vs. Hiring Professionals
Pros and Cons of DIY Staining DIY staining can be a rewarding experience, but it comes with both advantages and disadvantages:
Advantages:
- Cost-saving: DIY staining saves money on labor costs.
- Personal Touch: You can achieve a customized look that reflects your style.
Disadvantages:
- Time-Consuming: Staining floors is a labor-intensive process.
- Skill Required: Achieving a professional finish requires skill and experience.
When to Consider Hiring Professionals Consider hiring professionals for timber floor staining in the following scenarios:
- Large Area: Staining a large area can be overwhelming for a DIY project.
- Complex Designs: Professionals can execute intricate staining designs with precision.
- Lack of Experience: If you lack experience in staining, professionals can ensure a flawless finish.
Eco-Friendly Staining Options
Environmentally Friendly Stain Choices If you’re environmentally conscious, consider these eco-friendly stain options:
- Water-Based Stains: These stains have low VOCs (volatile organic compounds) and are less harmful to the environment.
- Natural Stains: Made from plant-based ingredients, natural stains are biodegradable and sustainable.
Sustainable Practices for Timber Floor Staining Practice eco-friendly timber floor staining with these sustainable tips:
- Use Reclaimed Wood: Opt for reclaimed or salvaged wood to reduce demand for new resources.
- Recycle and Reuse: Dispose of staining materials responsibly and recycle whenever possible.
Timber Floor Staining Inspirations
Showcasing Beautiful Stained Timber Floors Explore stunning examples of stained timber floors for inspiration:
- Rustic Elegance: Dark stained oak floors with distressed details and a matte finish exude rustic charm.
- Contemporary Chic: Light-stained maple floors with a glossy finish lend a contemporary and airy vibe.
Inspiring Design Ideas and Aesthetics Discover creative design ideas for stained timber floors:
- Statement Stairs: Stain the stairs a different color to create a striking focal point in your interior.
- Colorful Accents: Add pops of color with stained patterns or borders around furniture or room edges.
Conclusion
Timber floor staining is an artful process that brings out the inherent beauty of wood, transforming ordinary floors into extraordinary works of art. By choosing the right stain, properly preparing the timber, and applying the stain with care, you can achieve stunning results that complement your interior decor and reflect your personal style. Remember to maintain and care for your stained timber floors regularly, ensuring their longevity and allure for years to come.
…